♦ Step #1
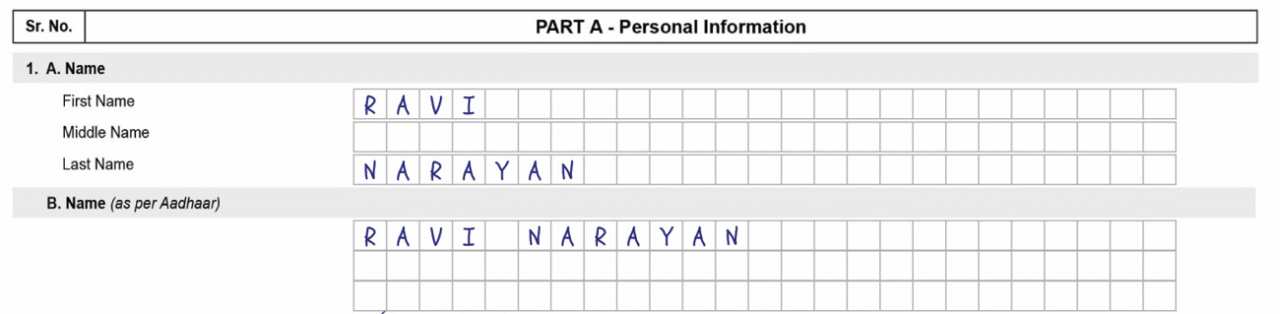
PART A – Personal Information
Print the pdf first formlink
After that affix the 2 photo as given below
And sign on the left side photo.
पहले pdf प्रिंट करें formlink
उसके बाद निचे दिए गए चित्र के अनुसार 2 फोटो चिपकाए
और बाईं ओर की तस्वीर पर हस्ताक्षर करें।

♦ Step #2
1.A. Name Enter the applicant’s name in the correct format.
B. Name Enter the name of the applicant as it appears on his/her Aadhaar card.
1.A. Name में आवेदक का नाम सही format में fill करे
B. Name में आवेदक का नाम fill करे जो उसके आधार कार्ड पर हे
Note: agar aapako Applicant name Father name Mother name fill karne mein koee bhi problem ya doubt hai to aap ees link par click kar sakte hai https://mypancenter.com/how-to-fill-correct-format-applicant-name-father-and-title-in-pan-form/
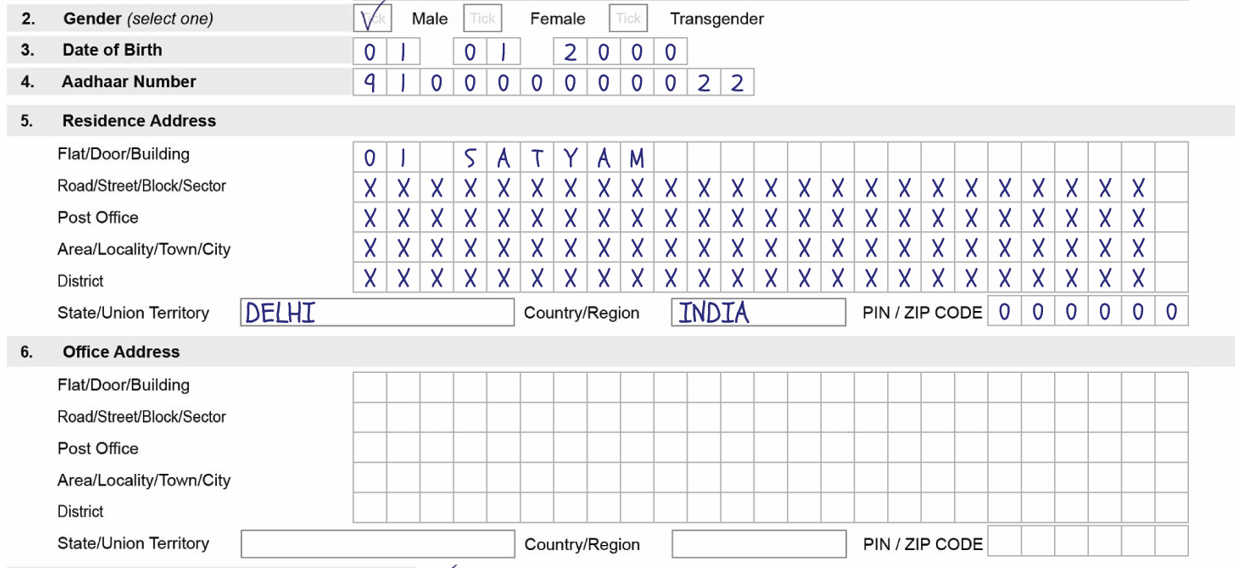
♦ Step #3
Select gender and fill date of birth and fill Aadhar number and fill address
Gender select करे और जन्म तिथि भरे और आधार नंबर fill करे और address fill करे
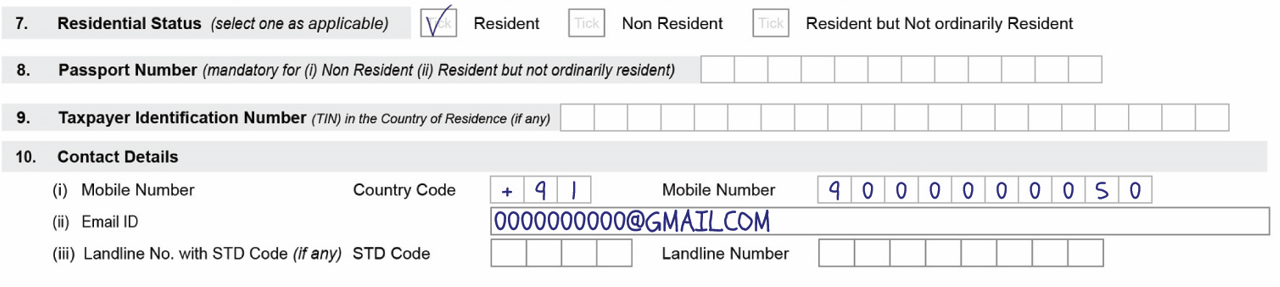
♦ Step #4
7.residential Status (select one as applicable) If you are entering the address exactly as it appears on your Aadhaar card, select “Residence”; however, if you have entered your office address, select “Non-Resident.”
10.Contact Details ‘Country Code’ 91 और mobile number email id fill करे
7.residential Status (select one as applicable) यदि आप आधार कार्ड पर जो address है वो ही fill कर रहे है तो “Residence” select करे और यदि आपने आपना office का address fill किया है तो “Non Residen” select करे
10.Contact Details में ‘Country Code’ 91 और mobile number email id fill करे
PART B- Source of Income
♦ Step #5
11.Source of Income Select your source of income. If you are unemployed, elderly, or a child, please select “No Income.”
11.Source of Income में अपना Income source select करें अगर आप एक बेरोजगार , वृद्ध . बच्चे हे तो आप “No Icome” select करे

PART C – Details of Parents
♦ Step #6
12.Whether mother/father is a single parent? (select one) Select “No” in this.
Fill in your father’s and mother’s names.
15.Name of parent to be printed on Permanent Account Number card (select one) Select “Father” in this.
12.Whether mother/father is a single parent? (select one) इसमें “No” सेलेक्ट करें
अपने पिता और माता का नाम fill करे
15.Name of parent to be printed on Permanent Account Number card (select one) इसमें “Father” सेलेक्ट करें


PART D – Assessing Officer (AO Code)
♦ Step #7
In this option, you need to enter the AO code.
इस option में आपको AO code fill करना हे अगर आपको आपनी city AO code नही पता तो आप इस लिंक पर क्लिक कर पता कर सकते हे https://tin.tin.proteantech.in/pan/servlet/AOSearch

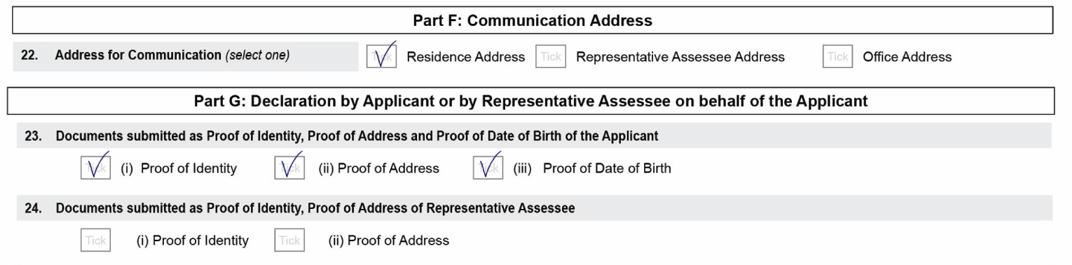
Part G: Declaration by Applicant or by Representative Assessee on behalf of the Applicant
♦ Step #7
23.Documents submitted as Proof of Identity, Proof of Address and Proof of Date of Birth of the Applicant इस में तीनो आप्शन पर टिक करो
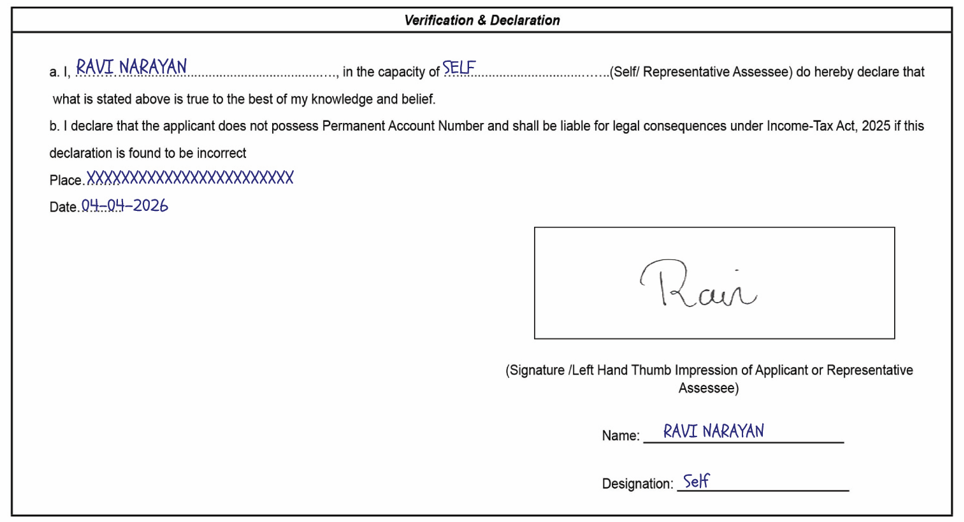
Verification & Declaration
♦ Step #8
Fill in the applicant’s name under “a.I.”; enter “SELF” under ‘in the capacity of’; and fill in the place, date, signature, name, and “Self” under “Designation.”
“a.I,” में applicant का नाम fill करे और ‘in the capacity of‘ में “SELF” और place name , date , signature , name , और “Designation” में “Self” fill करे